Wanna know the one beauty tool that really freaks me out? Or, it used to.
Join me as I share my personal journey of conquering my very real fear of eyelash curlers and how it has become one of my favorite aspects of beauty makeup. Learn some valuable tips, tricks, and hacks for using your eyelash curlers effectively, whether you’re a beginner or experienced with eyelash curlers, these insights and recommendations will help you embrace this beauty tool with confidence. So get ready to transform your lashes and open up your eyes in just five minutes.
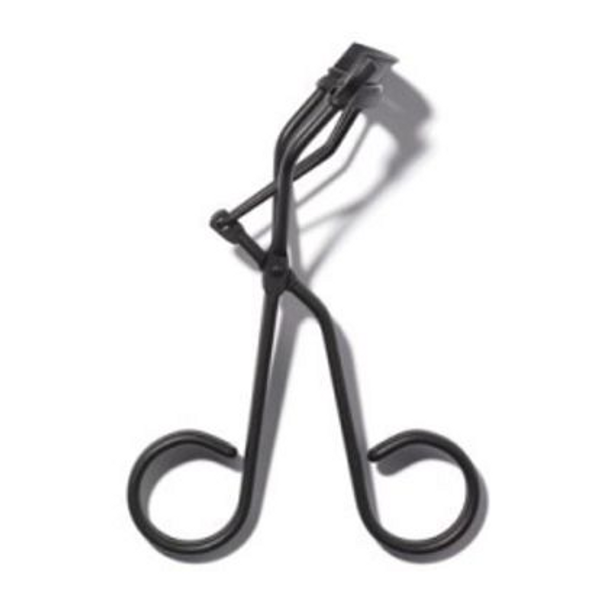
i had to get over my fear of this beauty product

Listen to Episode:
.
.
This post may contain affiliate links, such as Amazon and Shop My, that I may earn from qualifying links. This means I’ll receive a commission if you purchase through my links, but never fear, because it means no extra cost to you. Please read full disclosure for more information.
.
In This Episode We Cover:
- When exactly is the best time to curly your eyelashes.
- Techniques to make for easy eyelash curling.
- My recommendations for eyelash curlers for your eyes.
.
click here to read the transcript!
Episode 32: Show notes
It’s not easy to admit this, but yeah – I have to tell you something.
And it ties strongly with this episode, in fact it was the very inspiration for creating it.
But I used to be terrified of curling eyelashes.
Yes, you heard that right.
I used to have a genuine fear of these innocent-looking beauty tools. It was only through the guidance of my dear friends and co-workers, Abigail and Mo, that I could overcome my fear and embrace the transformative power of eyelash curlers.
So, prepare yourself for an engaging and relatable journey into the world of beauty and self-discovery.
Fear Turned Love
As a dedicated makeup lover, I would always feel a little apprehensive whenever the topic of eyelash curlers came up.
I would nervously dodge conversations and try to avoid having to handle them. It was a whole ordeal until one pivotal day when I decided that enough was enough.
I owed it to myself to conquer this fear and unlock the potential that eyelash curlers had to offer.
The Beauty Benefits
Little did I know that my fear was preventing me from experiencing the massive effects of curled lashes.
Eyelash curlers, as I soon discovered, had the power to open up the eyes, add definition, and make them appear bigger.
This simple tool made such a significant difference in my makeup routine (and the folks I made up) that it quickly became one of my favorite beauty steps.
Little did I know that my fear prevented me from experiencing the massive effects of curled lashes.
Hacks, Tips and Tricks
Now, let’s delve into some of the top hacks, tips, and tricks I’ve learned along the way to help you make the most out of your eyelash curler adventures.
- Timing is Everything: Always curl your lashes before applying mascara. Mascara acts as a glue to your lash curler, and curling after mascara application can lead to lash damage and loss.
- DIY Heated Lash Curler: Don’t want to invest in a heated lash curler? No problem! By placing your regular lash curler in a cup of hot water or giving it a quick blast of warm air from your hairdryer, you can create your own heated effect. Just remember to test the temperature on your inner wrist before using it on your eyes.
- The Base Matters: Position your lash curler close to your eyelids to start the curl from the base of your lashes. Squeeze and hold for five to ten seconds, gradually moving outwards towards the mid-length to the end of your lashes for a natural, crimp-free curl.
- Lash Curler Size Matters: Choose a lash curler that matches the length and size of your eyes. Not all lash curlers are the same, so finding the right fit is crucial for comfort and effectiveness. Consider brands like Shu Uemera S, Kevyn Aucoin, and Tweezerman Pro Master Eyelash Curler.
- Hygiene is Key: Clean your lash curler regularly with a 70% alcohol solution or a dedicated lash curler cleansing product. Wipe it down after each use and store it in a clean, dry drawer away from sunlight.
- Double Mascara Application: For those struggling to hold a curl, try a double mascara application technique. After curling your lashes, apply a coat of waterproof mascara first, followed by a coat of regular mascara once the waterproof formula is dry. The added layer can help your curls last longer.
Facing my fear of eyelash curlers was a big leap in my beauty journey, and I couldn’t be happier with the results.
It’s incredible how a seemingly small step in the makeup routine can make such a significant impact on the overall looks we create, and your confidence levels.
So, if you’re anything like me and have been hesitant about using eyelash curlers, I encourage you to take the leap and give them a try.
You may just discover a whole new level of beauty enhancement and self-expression.
Remember, practice makes perfect, so don’t be discouraged if you don’t achieve the desired results right away.
Explore different techniques and find what works best for you. Let’s embrace the power of eyelash curlers together and unlock our eyes’ true potential.
Click here to listen to this episode!
.
Links & Resources Mentioned in this Episode:

Episode Transcript
[00:00:00]: Welcome back to Five Minute Face Talk.
It doesn’t seem that long ago that I actually had a bit of a fear of eyelash curlers. This is a true story.
I would always get kind of sheepish around that time that the lashes came around in a makeup, and I would always kind of nervously avoid having to talk about it, try and get the person to curl their own lashes without them knowing that I was nervous. It was a whole thing, until one day I just decided that enough was enough.
[00:01:07]: So thank you to my dear friends and sometimes co-workers Abigail and Mo, who helped me conquer my fear of the eyelash curler. It’s now actually one of my favorite aspects of a beauty makeup.
I love curling eyelashes. And you know why? Because it really does make a difference to the shape of your eye and the definition of your eyes.
Try it yourself. If you go into your bathroom and look at your eyes without any makeup, mascara, or curling done, and if you’ve got lash extensions, maybe this exercise isn’t going to be quite so effective.
So take a look at your eyes, then give them a quick curl with a lash curler and see how much they actually open up your eyes and make your eyes appear bigger. It’s so effective.
[00:01:53]: Okay, so let’s take a look at some of the best hacks tips and tricks that you can start with today with your beloved eyelash curler. Some of these might feel like I’m stating the bleeding obvious, and I think I almost mean that literally. So let’s start right there.
Okay. Always use your lash curlers before you apply your mascara. Mascara acts as a glue to your lash curler, so if you use an eyelash curler on eyelashes that are coated with mascara, bleeding is what you’ll be from your eyes. Seriously, there are horror stories of women being bumped, jolted, and losing lashes, and the same goes for curling. After mascara, your lashes can and will stick to the silicon pad and get yanked out.
00:02:42]: So always curl first, mascara second.
You don’t need to buy a heated eyelash curler. Just warm up your own curler. Yep, by simply popping your eyelash curler into a cup of hot water or giving it a quick blast under the hairdryer, you can effectively create your very own DIY heated lash curler.
This is going to help give you a stronger curl that lasts longer. Win-win. Just don’t go too hot with your hair dryer or even with the water, and you can always temperature test it first as well. If it’s too hot on your inner wrist, it’s too hot for your eyes.
[00:03:20]: When you start curling your eyelashes, try to position the curler close to your eyelids. This will start the curl from the base of your lashes, so you’ll squeeze and hold the curler for five to 10 seconds.
So squeeze it firmly, then release and gradually move it out and away from your eye and give it a slightly less firm pump or two. Then again, release it and move it further towards the mid-length to end of your lash for a natural curl that follows the entire length of your lash. This will avoid the crimped look that nobody is going for.
Be sure to use lash curlers that are a similar length and size to your eyes. Now this is actually really important, so make sure that your lash curler is the same or a similar size to your eyes, because not all lash curlers are the same size. For instance, if you have smaller eyes, how about giving the Shu Uemera S Curler a go? Or, for larger almond or deep-set eyes, you can’t go past the Kevyn Aucoin or the Tweezerman Pro Master Eyelash Curler.
[00:04:28]: One of my favorites. I think I have three Tweezerman eyelash curlers. I love them. And then the award-winning all-rounder Surrat Relevee, which might be too big if your eyes are very small. But I love it and it looks classy as well. Class. It looks classy. Be sure to clean your lash curler after you have used it.
[00:04:50]: Sometimes things are easier said than done, so you must be sure to clean the silicon pads with a 70% alcohol or something like beauty, so clean after you use them. So wipe it with your solution and then dry it off.
And once you’ve done that, you can store them out of the sun in a clean dry drawer to keep them safe, protected and dry. If you have trouble holding a curl with your eyelashes, try a double mascara application.
Now what this means is once you’ve curled your eyelashes, go ahead and apply a waterproof mascara coat to your eyelashes. Now once you’ve done that and the mascara is dry, then try a coat of regular mascara.
So it’s like a double application with your waterproof and then your regular. Now this should help to hold the curl longer and keep your lashes looking fab even longer too.
[00:05:42]: When you start curling your eyelashes, position the mirror lower than your face.
Try popping a small mirror on a table so your eyes are naturally looking down before you place the curler to your eye. This ensures that you can get a comfortable position going and really get a lift as your curler pushes your lashes upwards, while from a natural downwards position. So your eyes are looking down and the curler is working upwards.
And that is it. They are my quick tips, tricks, hacks, whatever you want to call them for eyelash curling, please let me know. Give me a DM. Send me a DM on Instagram at the makeup refinery.
[00:06:24]: And I’ve got a few blog posts floating about on eyelash curlers, so I’ll link to them, too.
If you’re stuck with brands to try, or if you’re a complete eyelash curler beginner or newbie and you’re terrified, I have been there. I was there till not that long ago, actually. I don’t know. I think it’s because they kind of just look like tortured tools or torture devices, don’t they? But they’re really not.
You just have to know what you’re doing. Don’t ever curl your eyelashes when there’s someone behind you. Always do it where nobody can bump you from behind, because that can also be really ugly and painful.
[00:07:01]: Okay, my friend, thank you again. I hope you enjoyed this little episode, and I’ll see you next time, okay? Bye.
.
Take Me Back to the Podcast Homepage
More about the Podcast
If you loved this episode, and you haven’t subscribed to the podcast yet,
don’t forget to subscribe.
And if you know someone, perhaps you have a friend who’s a makeup artist or loves makeup, and is always looking for a new makeup podcast to pop in their ears, then it would mean the world to me if you could share my podcast with them.
I love makeup and skincare, and it’s my honor to share my passion with you, so you can listen to my show, Monday and Thursday, by simply subscribing below.
Subscribe On:
.


